Showing posts with label Valentine's Crafts. Show all posts

Monday, February 3, 2014

Love Is In the Air-Quilt Kit


I know I was just talking about how I have nothing really to decorate my house for Valentine's Day---well I am on a roll now! I've got a Valentine's Pillow, Quilt, and Table runner now! :)  Now I can add another quilt to the list! :)

I forgot my friend gave me this fun little quilt kit for Valentine's Day.  I was going through my fabric and looking for something and came across the kit--and figured I should put it together! It is February after all, and I have never put together a quilt from a kit before so I thought I would give it a try!

The fabric is called Love Is In The Air by Deb Strain for Moda.

I literally put this together in less than 2 hours.  The quilt is made out of the panel in the middle and then two borders, plus prairie points.  I had no idea that prairie points were to easy to put together.  I can't tell you how fun it was to make this--it required no thinking at all! lol--I am used to creating my own patterns-- and that requires a lot of thinking, math, and measurements.  I didn't have to do any of that!   It was so nice to sit at my sewing machine and put this together without trying to figure out the correct measurements! 

I just need to baste and quilt this baby and it will be done! :) I am now a fan of quilt kits! I will definitely do this again sometime! :)

Talk to you soon,


*Mandy's Recipe Box Tuesday *Time To Sparkle *Wow Me Wednesday at Polkadots on Parade Whimsy Wednesday at The NY Melrose Family *Wip Wednesday at Freshly Pieced Sew Fresh Quilts  Let's Bee Social Wow Us Wednesday at Savvy Southern Cottage *We Did It Wednesday! at Sew Much Ado
Needle and Thread Thursday by My Quilt Infatuation *Really Random Thursday by Live a Colorful Life
Thursday Threads by 627Handworks * I Quilt by Pretty BobbinsLink Party Palooza at Today's Creative Blog *Show and Tell Saturday at Be Different Act Normal


Monday, February 14, 2011

Look what I got for Valentine's Day!

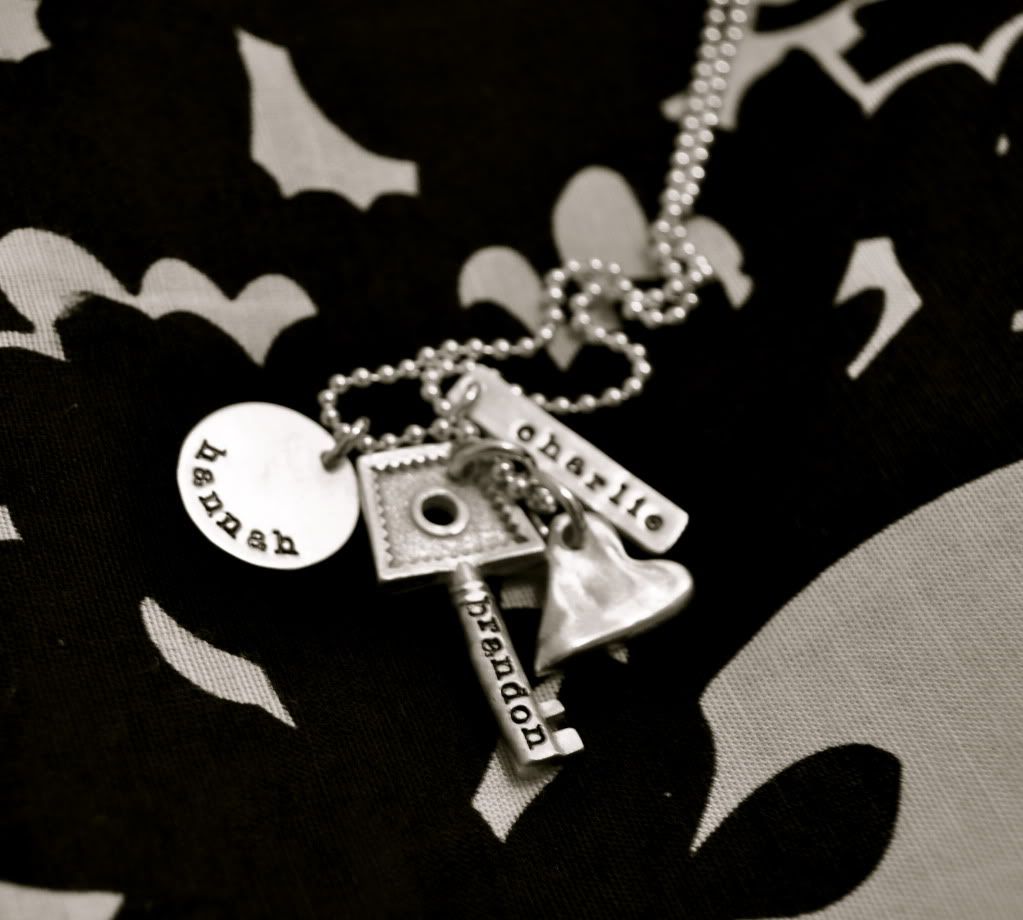
I just had to share what my hubby got me for Love day!


I have wanted this necklace forever!!! It is perfect and it looks even better than I expected. I have tried to win one of these babies whenever she does a giveaway, but I have never been lucky enough to win one. I mentioned to my hubby a little while back that I really wanted one of these necklaces, and he surprised me and bought me one for Valentine's Day! I LOVE it! It is perfect. The thing I love most, is that I could wear this necklace with anything. It is all silver and will match anything I wear.

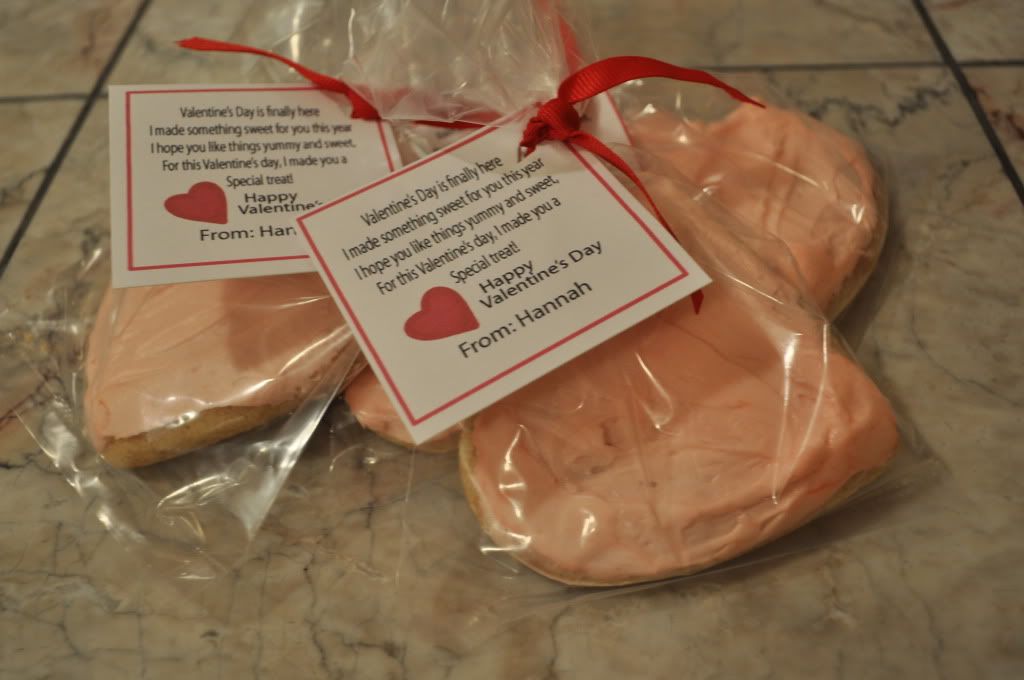
I also wanted to share Hannah's Valentine's she made for her class. We made these cookies and I just made up a little saying to put with them. So easy and yummy!


I am making my hubby a special Valentine's Dinner, my grandmother's Beef Enchiladas....I have never tried to make this so wish me luck! I am also making Sour Cream Cheesecake for dessert! YUM!! :) Recipes to come later! :)

I hope you all have a wonderful Valentine's Day! :)

Wednesday, February 2, 2011

Wood Conversation Hearts : . Tutorial . :

These Conversation Hearts are so fun and festive for Valentine's Day! I love conversation hearts, they are a must for Valentine's day. If you want to make your own Conversation Hearts, here is the tutorial I promised:

Photobucket

Supplies Needed:

3 Wooden hearts
paint
Distressing ink
Coordinating paper
Ribbon
Buttons
Mod podge
Hot Glue

Step 1: Paint your hearts

Step 2: Trace your hearts onto your paper and then cut them out.
Step 3: Mod Podge your paper onto your hearts

Step 4: Sand and distress the edges of your hearts with any color of ink you prefer.

Step 5: Cut out your letters. I used my cricut and used the template "jubilee" and then mod podge your letters onto your hearts

Step 6: Embellish your hearts! You can keep it as simple as you want or go crazy!


The hearts are thick enough that they can sit on their sides by themselves. Or, if you want to hang them up you can hot glue some ribbon on the back to hang them on the wall.

Photobucket

I love how they turned out and they are so much fun!! They make a great Valentine's Decoration, and they look perfect on my shelf! :)

I am linking to:


Monday, January 31, 2011

Wood Conversation Hearts

What's Valentine's Day without Conversation Hearts? Conversation Hearts are probably the most recognizable Valentine's Day candy ever....So I decided to make my own version of the popular candy! Only mine are not edible! :)


My version of a Conversation Heart

Photobucket


I love how they turned out. So fun and festive for Valentine's Day!
Check back Wednesday for the Tutorial.

Wednesday, January 12, 2011

Love Coupons--Free Printable

I love celebrating Valentine's Day! Which is funny because I'm not a very romantic person---but my husband is VERY romantic! I think that's why I like it so much, because I know he always has something fun and romantic planned for me each year!

As you know we are "poor college students" :) and we can't always afford to go all out like we used to for Valentine's Day. So I came up with a solution this year. I am making my hubby these love coupons!


I used my new graphic design skills to whip these sweet things up! :) I had fun making them. I know they aren't super amazing, but I am still a beginner and I have to keep practicing or I will forget all that I learned!

Aren't they fun? I can't wait to use them! You can be as romantic as you want or you can just have fun with them!I thought I would make them into a PDF so that anyone that wants to use these can for free. You can print them here.

I am participating in:

Thursday, January 28, 2010

Paper Heart Trees Tutorial!


Okay, for Craft Night this month we made my Paper Heart Trees! It was so much fun and everyone did such a great job making them!!!

I have now made 4 Paper Heart Trees...and I am done! I love them...but can I just say that I am sick of cutting out hearts!!


Okay so here we go!

Supplies needed:

1 - 8 1/2 by 11" frame
1 piece of Black Cardstock 8 1/2 by 11" (make sure you cut this to fit your frame! Sometimes this size is a little too big so make sure it fits!)
1 piece of pink cardstock cut to 11" x 6"
1 piece of brown cardstock for the tree.
20-25 hearts cut out of coordinating scrapbook paper. My sizes range from 1/2"- 1 1/2"
The word "love" cut to 1 1/2 inches tall
6 buttons
Red ribbon
Ink
Glue Stick
Hot Glue
Scissors

Step 1: Cut your black piece of cardstock to fit your frame

Step 2: Cut your pink piece of cardstock 11" x 6"

Step 3: Trace your tree template onto a brown piece of paper and cut out

Step 4: Glue your tree on the center of your pink paper


Step 5: Ink the edges of all of your hearts and letters. This helps them stand out on the paper better.


Step 6: Place your hearts all around your tree until you like the way it looks then glue them on

Step 7: Hot glue buttons on some of the hearts.


Step 8: Glue your letters on the side of your black pannel


Step 9: Hot glue your buttons in between your letters.


Step 10: Tie your ribbon around where the pink paper meets the black paper and just tie a knot


Now place your paper in your frame and your done!!
This was so fun for a craft night project and only cost 6 dollars per person to make!!


Here are all the ladies showing off their new Paper Heart Trees!!


I am participating in SYS at Somewhat Simple

Tuesday, January 26, 2010

"XOXO" Rag Garland

I said I was going to make one of these and I finally got it done! I got my inspiration from here.
I LOVE how it turned out and it was so simple to make.


This garland is so easy to make!
The base of the garland is a large piece of ribbon about 2 inches wide. To make the garland all you need is some fabric to make the garland itself. Rip your fabric into strips and then cut the strips to be about 5-6 inches long. Then just tie each piece of fabric onto your ribbon base until you like the look of it. I made mine really full because I had a lot of fabric scraps.

To make the "XO's" and the hearts, I bought some wood letters and hearts from my local craft store that cost about .75 cents and my husband drilled a small hole in the corner of each letter and heart so that I could tie a ribbon to hang them. To decorate the letters, just use some mod podge to apply some scrapbook paper to the letters and embellish with buttons and ribbon! To finish just hang your letters and hearts with some ribbon and your done! So easy!


Also, don't forget to enter my free Cookbook giveaway sponsored by Cedar Fort. You have until this Friday to enter! Good Luck! Go HERE to enter!

I am participating in Get Your Craft On at Today's Creative Blog , Talented Tuesday at My Fruagl Family, Show and Tell Wednesday at Blue Cricket Design, SYS with Somewhat Simple and Do it yourself day at A Soft Place To Land

Thursday, January 21, 2010

Valentine's Garland


Okay, I found this fabulous garland from one of my readers and had to post it because i LOVE It! It is so fun and cute for Valentine's day! You can find it here! Go check it out! I am definitely making this project! Thanks Stephanie for sharing this fun project!!!
If you have a Valentine's day craft that you made, I would love to hear from you! You can email me at linzaliz15 @ hotmail . com or leave me a comment!

Monday, January 18, 2010

Mini Matchbox Valentine's

I got this idea from my Mini Matchbox Christmas Tree. I have a bunch of mini matchboxes left over from that project, so I decided to make them into mini matchbox Valentine's. They are so tiny and cute. You can give one of these to your sweetheart with a love note in it OR if you were really ambitious you could make them for your child's class for Valentine's day and put a miniature hershey chocolate (they fit perfect) inside each one.


I am participating in:

Talented Tuesday, Strut your Stuff Thursday, Crap I've Made, and Show and Tell Wednesday

Wednesday, January 13, 2010

"heart tree" and some advice

Okay, I am ready for it to be February! I've made another Valentine's Decoration that is super simple to make and really inexpensive. I decided to call it "heart tree" I like how it turned out and it was so easy to make! You could also make this into a card or even have your kids help you make it.


It was really easy to make and all you need is:
a small frame
paper
buttons
ribbon
glue
All I did to make this was cut out a bunch of hearts with my cricut machine in different sizes ranging from an inch to 1/2 an inch. To make the tree I just free handed a tree and cut it out of brown paper. I also cut out the word "love" to add to the side. To finish it off just add some buttons and a ribbon.

So fun and inexpensive. I hope you like it!

Okay, so now for the advice part. I have a dilemma. I am trying to potty train my little girl and since she is my first, I have no idea what I'm doing. :) It is not as simple as I thought!! I have tried a couple of different things with her and I know she is ready and she is interested, but for some reason she just won't go in the potty. So.........i am looking for any suggestions or advice that you might have!!! Any suggestions would help!! :)


giveaways