Tuesday, August 31, 2010

Dollar Store Frame Revamp!

Hannah is turning 3 in a couple of weeks and I have been working on throwing her a Birthday Party! I don't really have a theme or anything, but I am doing it all in brown, pink, and white! For the table center pieces I am decorating dollar store frames and putting a picture of Hannah in the middle.


Here are the frames that I am using. They come in all different sizes. The one I am using for her birthday party is a 5 x 7 size frame.

This is the after!


It's amazing what a little paper and ribbon can do to a frame! :)


I used tiny clothespins to hang the picture up. I used photo corners to attach the picture so that you can change the picture every year!


The best part is that these can be given as a party favor to your special guests--like grandparents!


I am participating in the following parties:
Get your craft on!

Monday, August 30, 2010

First Day of Preschool and Hair bows!

It was Hannah's first day of Preschool today! I can't believe how time flies! She was so excited to go to preschool and has talked about it for the past week! Well today was the day, and she had a blast!

I was trying to be the good mom and take a picture of her on her first day of preschool....but she did not want her picture taken this morning! It took everything I had to get a smile out of her, and then when I did her eyes were shut!!

Then to top it off, when we were done I accidentally locked us out of the house. So let's just say it wasn't the best morning :)
For her special day, I attempted to make some hair bows! :) I know I should probably be a pro at making hair accessories because I have a little girl--but that is not the case. This is my first attempt at making her some hair bows. It has taken 3 years for her to like wearing bows....so I figured I might as well start learning how to make some!

Now, they are not perfect by any means...and I would be completely embarrassed to show you how I made these..because I'm pretty sure I made these the unconventional way....meaning hot glue was my best friend :)


Now that I have started...I'm afraid that I will have to make bows to match every outfit. :) I want to make different ones, but I'm not sure what to try.

If you have a favorite hair accessory I would love to see it--even better if it's a tutorial :)

Sunday, August 29, 2010

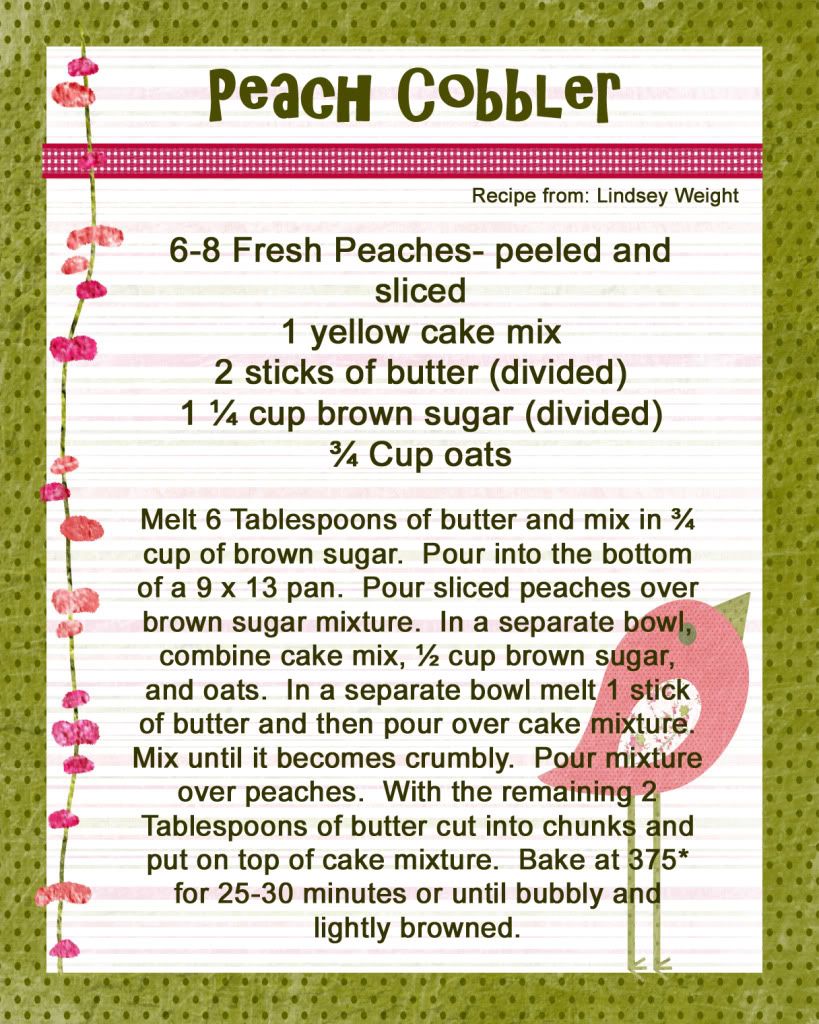
Peach Cobbler


3 years ago I was pregnant with my daughter and during that pregnancy I had an obsession with Peach Cobbler! I have tasted many cobblers, but none of them were exactly what I was looking for. So I came up with my own recipe! I have made this recipe every summer since then and it is always delicious! :)


Photobucket


Go here for the printable recipe.


Wednesday, August 25, 2010

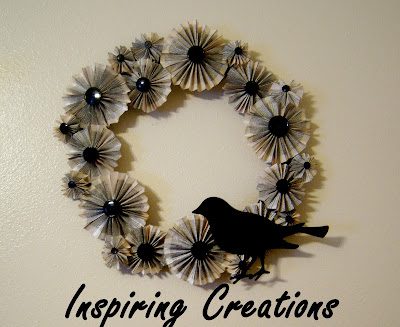
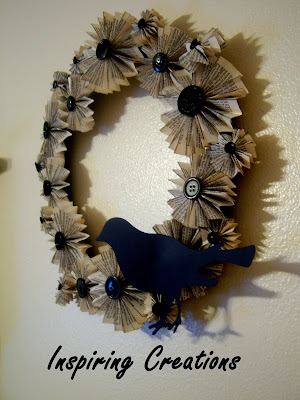
Paper Fan-Flower Wreath

I have been in a crafty mood lately....I go in major spurts. One week I will craft all week long...the next I don't want anything to do with crafting. I think that since I only have a couple more months until the baby comes that I am trying to cram in as much crafting as I can. I know that once he comes, I won't have a lot of time to do any crafting. So let's hope this spurt doesn't run out! :) Anyways, on to my latest project.

After making my last project, I was inspired to make a wreath out of the paper fan-flowers! And of course, I had to add a bird :)


Supplies:

An old book (for the paper)
Hot Glue
Wire Wreath
Buttons
Distressing ink
Black bird cut out (i used the cricut cartridge "give a hoot")

Step 1: Make your fan flowers! I used about 6 large, 8 Medium, and 8 small


Step 2: Make your Wreath Form. I made mine out of an old wire hanger. (well my husband made it for me :) )

Step 3: hot glue some black card-stock all around your frame. This won't show, this is just used to glue the flowers onto!


Step 4: Hot glue your flowers onto the card-stock


step 5: hot glue your bird cut out onto the wreath


That's it!


I am participating in the following parties:

Monday, August 23, 2010

Bird Frame with Paper Fan Flower


Remember these frames from my last post? Well I finally figured out what to do with them! Since I kind of have a bird theme for our room, I decided to stick with it and add some more birds!! Plus, I just bought the cricut cartridge "give a hoot" and had to try it out!!

I am loving the bird trend right now! I can't wait to do more bird themed projects! This project was so easy and way inexpensive. It was also a project that can be done in less than an hour! The longest part is making the flowers! Everything else is a piece of cake!


Supplies:

Frame
Mat Board
An old book (that you can tear out the pages)
Mod Podge
Black bird cut out. (I used the cricut cartridge "give a hoot")
Hot Glue
Buttons
Distressing Ink

Step 1: Cut out a piece of mat board to fit your frame. Mine was 10x10

Step 2: Tear out pages of an old book and mod podge them on your mat board

This is what it will look like when you've covered your whole board

Step 3: Mod podge your bird on top of the paper


Step 4: make your Fan-Flowers ( I made one large, one medium, and one small flower for this frame)


Step 5: Hot glue your fan-flowers on your frame

That's it! How easy was that!! I love how it turned out and it definitely goes with the rest of the decor in my room! And the best part was that it didn't cost me a dime! I had all of the supplies on hand from other projects.


I am participating in the following parties:


Wednesday, August 18, 2010

$10 Garage Sale Find


A couple weeks ago, I drove by a house who was having a yard sale and saw a huge black shelf! I saw it and new I had to have it!! I know a shelf like this new would cost me close to $100 bucks, so I new I had to buy it!

I got it for ten bucks and it was in such good condition that I didn't have to do anything with it! I just wiped it off really well and decorated it! I have wanted a quilt rack shelf for a while now and I am so happy I found it! We have so many beautiful quilts/afghans that have been made for us and they are just sitting in a box in our closet. So now I have something to show them off with! :)


I think I want to put something in those empty frames....but I'm not sure what! If you have any ideas let me know!

Tuesday, August 17, 2010

Homemade Bread

Before I show you my homemade bread --I just wanted to thank Kim over at Today's Creative Blog for featuring me yesterday! It completely made my whole week!! I love her blog and her weekly party "Get Your Craft On!" It gives crafters like me an opportunity to show more people my crafts and it gives me the chance to see blogs and crafts I have never seen! So if you haven't checked it out--you should! :)

Okay so on to my post about homemade bread! Recently I have felt really motivated to make all things homemade! In the past month I have made:

**Homemade Pickles
**Homemade Peach-Pineapple Jam
**Homemade Strawberry Jam
**Homemade Bread

It has been so much fun making all of these things! And they are all so easy to make! It also gives you a great sense of accomplishment that you've made something homemade!!!
I have always been interested in cooking and making things from scratch. My mom was the best teacher, and since the early age of 2 I have been her little student just watching her cook.

Growing up, my mom made homemade bread all of the time! We were a family of six and so the bread didn't last very long in our house! We devoured it every time!!

Yesterday, I decided to try to make homemade bread for the first time on my own! I used a recipe out of a book that my mom bought me for my birthday last month and it was delicious!!! I will definitely make this bread over and over again! :)


Here is the recipe. **Recipe is from "Mormon Cooking"

Grandma's White Bread
2 packages of active dry yeast
2 3/4 Cups lukewarm water
1/2 cup nonfat dry milk
2 tablespoons of sugar
1 Tablespoon salt
1/3 cup cooking oil
7-7 1/2 cups sifted flour

Directions:
Sprinkle yeast on lukewarm water; stir to dissolve. Add dry milk, sugar, salt, oil, and 3 cups of flour. Beat with spoon until batter is smooth. Gradually add enough remaining flour to make a soft dough that leaves the sides of the bowl. Cover; let rest 15 minutes. Knead on floured surface until smooth and satiny, about 5 minutes. Divide dough in half; shape each half into a loaf. Place in two greased 9 x 5 x 3 inch loaf pans. Let rise until doubled, about 1- 1 1/2 hours. Bake in 400* oven for 25-35 minutes or until loaves sound hollow when tapped. Remove from pans; cool on racks.


It turned out so moist!!! It was delicious, especially with my homemade strawberry jam! :)

Monday, August 9, 2010

Jungle Themed Nursery!


I have been working on Charlie's Jungle themed nursery for weeks now and it is finally done!!! Well that is everything but his bedding......which I am still working on! But I thought I would post some pictures of what I have been working on for the last couple of weeks!


I had a very small budget and so I used a lot of things I already had and the rest was purchased at my local thrift store, craft store, and dollar store. I used my cricut machine for most of the projects and used the following cartridges: Zoobaloo, Jubilee, and Life's a Beach. The color scheme is mostly monochromatic. I used a lot of greens and then complimented them with browns. I hope you like it!


I bought this shelf at my local thrift store for $2 bucks!!! It was a steal! I painted it white and then sanded the edges and added some distressing ink to the edges.

The frames I also bought at my local thrift store for $2 bucks!! I painted them green and also used the same technique as the shelf when I distressed them. I then put some brown vinyl cut-outs on the wall behind the frames!


I made the curtains myself and they were probably the most expensive thing I bought. I bought the long white frame at my local thrift store for a buck and decorated the inside with jungle animals, ribbons and buttons. The basket was also from my local thrift store for a buck! I am filling the basket with burp rags that I have been making!


Here are the dollar store frames I bought and posted about earlier!

This frame I bought at my local thrift store as well for $2 bucks and painted it white and then distressed it. The other four frames were bought at Michael's and they were a dollar each.
The "King of the Jungle" vinyl was cut out using "life's a beach" cricut cartridge.


These frames were super easy to make! To make them all you need to do is mod podge paper on the fronts of the frames and then distress them. For the center of the frame I just cut out some animals from the cartridge "zooballoo" and mod podged them onto some brown paper.
I made these wood blocks with left over wood from various projects I've done. These were so easy to make. All you have to do is paint your block and then mod podge some paper on the front and then add whatever you'd like to the front. I hung them on the shelf with some ribbon that I hot glued to the back of the blocks!


I bought some wood letters at my local craft store and to make them fit my theme I mod podged paper on them and then added a few embellishments!
So there it is!! I am really happy with the way that it turned out and I can't wait to spend time in this room with my little one!