Tuesday, September 29, 2009

Potions!

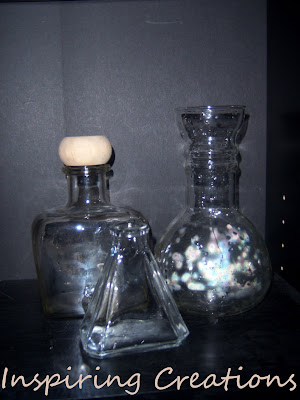
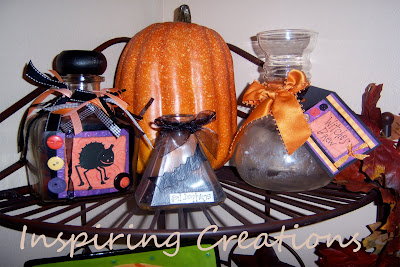
I found these cool containers at the DI all for two bucks! I thought they would be good to use for potion ingredients!


"Bat Droppings" I used raisins for the bat droppings and I drew a bat and cut it out of black card-stock then mod podged it on. I just used some white paper and wrote the label and also mod podged it on as well. I then used some black ribbon to finish it off.
"Witches Brew" To make the Witches Brew I made a tag out of some different papers buttons and ribbon. I wanted the container to look old and used so I applied mod podge to the bottom round part then when it dried I sanded some of it off to make it look older and then I tied a big orange ribbon around the middle to finish it off.
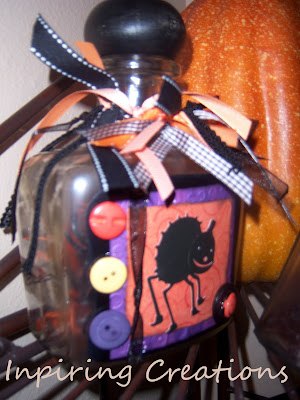
"Spiders" To make this one I just used Mod Podge to apply different scrapbook papers, then I used my Cricut Machine to cut out the spider (Stretch your Imagination cartridge) I used buttons and lost of ribbon to embellish this one and painted the lid black to match everything. I got some of those plastic spiders at the dollar store and put a bunch of them in the container.


I love decorating for Halloween!

Monday, September 28, 2009

Giveaway Winner!!!

I wanted to announce the winner to the Sweet Something's Giveaway! I did that random number generator thing and it chose number 6! Which is Cassie!! Congratulations!!! Thank you for everyone that entered! Hopefully there will be many more giveaways to come!!
*Cassie if you could email me at linzaliz15 @ hotmail dot com and I can get all your info!

Friday, September 25, 2009

About:

Hi! I'm Lindsey, and I want to welcome you to my blog! 


I have been married to my best friend for 7 years


We have three beautiful children.  Ages 6, 3, and 1. 

In my spare time, (which consists of an hour when kids are napping, and a couple hours at night!) I like to:
 read
run
sew
eat
watch good TV
blog stalk
bake
and spend time cuddling with my hubby. 

I have been blogging for seven years now and have had this craft blog for 4 years.  Like everyone else, my life has gone through many stages of growth and there have been times where most of the things I love to do have been put on hold.  

I stopped crafting/creating for about two years.  Life happens.  We get busy and we put things like crafting on hold.  The past couple of years we have been so busy with life!  My husband graduated from college and got a job, we had another child, and we have moved three times!  During the past two years, I have grown and learned a lot about myself and what really matters to me.  

My family will always come first, but I have found that in order to be happy and be the best mom and wife that I can be I have to take care of myself first!  I have to be selfish sometimes. I have to do things that make me happy! I have to devote time every single day for me.  It doesn't matter if it's 15 minutes of reading a good book, or an hour worth of sewing.  I make sure that I make time for myself every day.  If I don't I go completely nuts! :)

The past six months I have really found a new perspective on life:


I have been really trying to dedicate my life to this motto!  
I'm not going to lie and say my life is all peaches and cream every single day. It's not. It would be dishonest to tell you that I enjoy every single second of my life! Because I don't.  There are really hard days, but I have learned that tomorrow is another opportunity to start over and enjoy the blessings I have! 

So after a two year long hiatus on this blog, I have come back. 
I have started creating again.
I have started to enjoy my life more than ever!
I have done things and made things that I never thought I could! 
I am learning a little more about myself every single day.  
I am a creative person and I love sharing my creativity with others. 

Thanks for stopping by, and I hope to see you again soon! :)


Fall Decoration

I love the fall and I love decorating my house with all of the fall colors, but I am running out of room to put all of my creations! :) I still have a ton of tiles left from when I bought them about a month ago so I decided to make some Fall tiles and I mounted them on a piece of wood that I painted. If you don't have any tiles you could easily make these with chipboard (or use cereal boxes) To make them all you need is some coordinating scrapbook paper, ribbon, and buttons. I cut out the letters using my Cricut Machine (Alphalicious) I also used some stickers from 7gypsies. Here is the finished product:


Wednesday, September 23, 2009

My First Giveaway!!!!


Since today I am being featured on Tip Junkie (you can go check it out here) I thought I would do my very first giveaway!!! Sweet Something's is a small non-profit business that makes handmade baby items and other adorable gifts! All proceeds are going towards the Rogers' Family Adoption!! The giveaway is for 1 Baby gift set which includes the following: 1 set of booties and 1 beanie of your choice.

(these are just a couple of cute things you can chose from!)


You can enter multiple ways they are:


1. Go to the Sweet Something's website and look at all of their adorable products and leave a comment on my blog telling me what your favorite product is.


2. Become a Follower on my blog and leave a comment telling me you are a follower


3. Become a Follower on the Sweet Something's Blog and leaving another comment telling me you are a follower


4. Post a link on your blog about the giveaway and leave another comment that you posted the link on your blog!


So that is 4 ways you can enter this FABULOUS giveaway!!!

The giveaway will close on Saturday, September 26 and I will post the winner on Monday!! Good Luck!

Sunday, September 20, 2009

Halloween Pumpkin!


This Halloween pumpkin was super easy to make and only took me about a half an hour. I really liked how it turned out and now i want to do it to more of my fall pumpkins!!! Here is how I made it:

Supplies:
1 white pumpkin (i got mine at Robert's Arts and Crafts)
6 different kinds of black and white ribbon
Black card-stock (for tag)
White paper (for tag)
2 Black buttons
Terrifically Tacky Tape
Hot Glue

Step one: apply your tacky tape to the crevices of the pumpkin and then attach a black peice of ribbon from the top by the stem to the bottom of the pumpkin. (i used grosgrain black that is 3/8")

Step 2: Cut an 8" piece of thick ribbon and then out of your other 5 kinds of ribbons cut them to about 6" to 8" long (you want them to be different sizes so they don't all look the same) Then tie each of your smaller ribbons onto your big piece of ribbon until you like how it looks.


Step 3: Cut out a black piece of card-stock that is about 2" x 3", cut out a coordingating black and white piece of scrapbook paper that is 1 3/4 " x 2 3/4 " (i used decorative scissors to do this) and letters that say "BOO" (i used my cricut machine to do this and used the "Alphalicious" cartridge.) I made two little eyes inside the "O's" with two black buttons that I attached with hot glue. Glue your pieces together and then tie a piece of white ribbon around the right side of the tag to finish it off.


Step 4: Attach your 8" piece of ribbon to your pumpkin with hot glue. I just glued all around the entire stem and attached the ribbon.


Step 5: Attach your tag with a piece of ribbon and you're done!!


Wednesday, September 16, 2009

Craft Night "Happy Harvest" Blocks


Tonight was craft night and we made a cute and easy fall decoration. They are wood blocks that say "Happy Harvest" I really like how they turned out! Thanks to Calleen for getting all of the supplies!


Friday, September 11, 2009

"Home"

Today was my first day of not working! Yay! So I decided to get back into making some new projects....I've taken a little break this past week because I just started school and it has been CRAZY! Hopefully things will settle down more now that I have a little more time and I can get some projects done that I've started. Anyways, this project I just made is made out of a block of wood that I painted black and just decorated with paper and put the word "home" on it and then added some embellishments. I like how it turned out and it was super easy to make and didn't cost me a dime because I had everything on hand. I have a lot more wooden blocks.......imagine the possibilities! :)

Thursday, September 10, 2009

Furniture makeover

We got this cabinet at a garage sale for 10 bucks and I decided that It would make a better TV stand than what we currently have so we repainted with black spray paint and fixed it up a bit!


I'm not going to lie, our TV is really small....so once we get a bigger TV then this small entertainment center won't really work anymore so I already have big plans for this entertainment center!!! (i just hope i don't forget by the time we get a bigger TV) Anyways, I thought when I'm done using this as a TV stand I could turn it into a play kitchen. I've seen a bunch of people do this to old entertainment centers so I think I'm going to give it a try once we get a bigger TV. So anyways, this is the after....I already have some of my fall decor up, which I love, BUT I am so not ready for the summer to be over!!!!!
Oh, I'm not a big fan of putting the DVD's or Wii games in the window part...I wanted to use it to display decorations....but my husband had other plans as you can see! :)

Monday, September 7, 2009

Girly Magnet Board

I have been working on a magnet board for Hannah that is going to be her chore chart. I am still working on the chore chart part of it as you can see because I haven't quite figured out how I want to do that yet so if any of you have any suggestions that would be wonderful! I first painted it pink to match her room then I embellished it by making flowers out of lots and lots of buttons......(i am sick of buttons) I then decorated a big letter H with some paper and more buttons and ribbon. To make the part where it hangs I just got a big piece of thick ribbon and then cut out a bunch of smaller pieces of ribbon and tied each small piece on the big piece of ribbon.
I took this picture with the metal part taken out because I couldn't get a good picture with the metal in. The picture below is what it looks like with the metal in.